
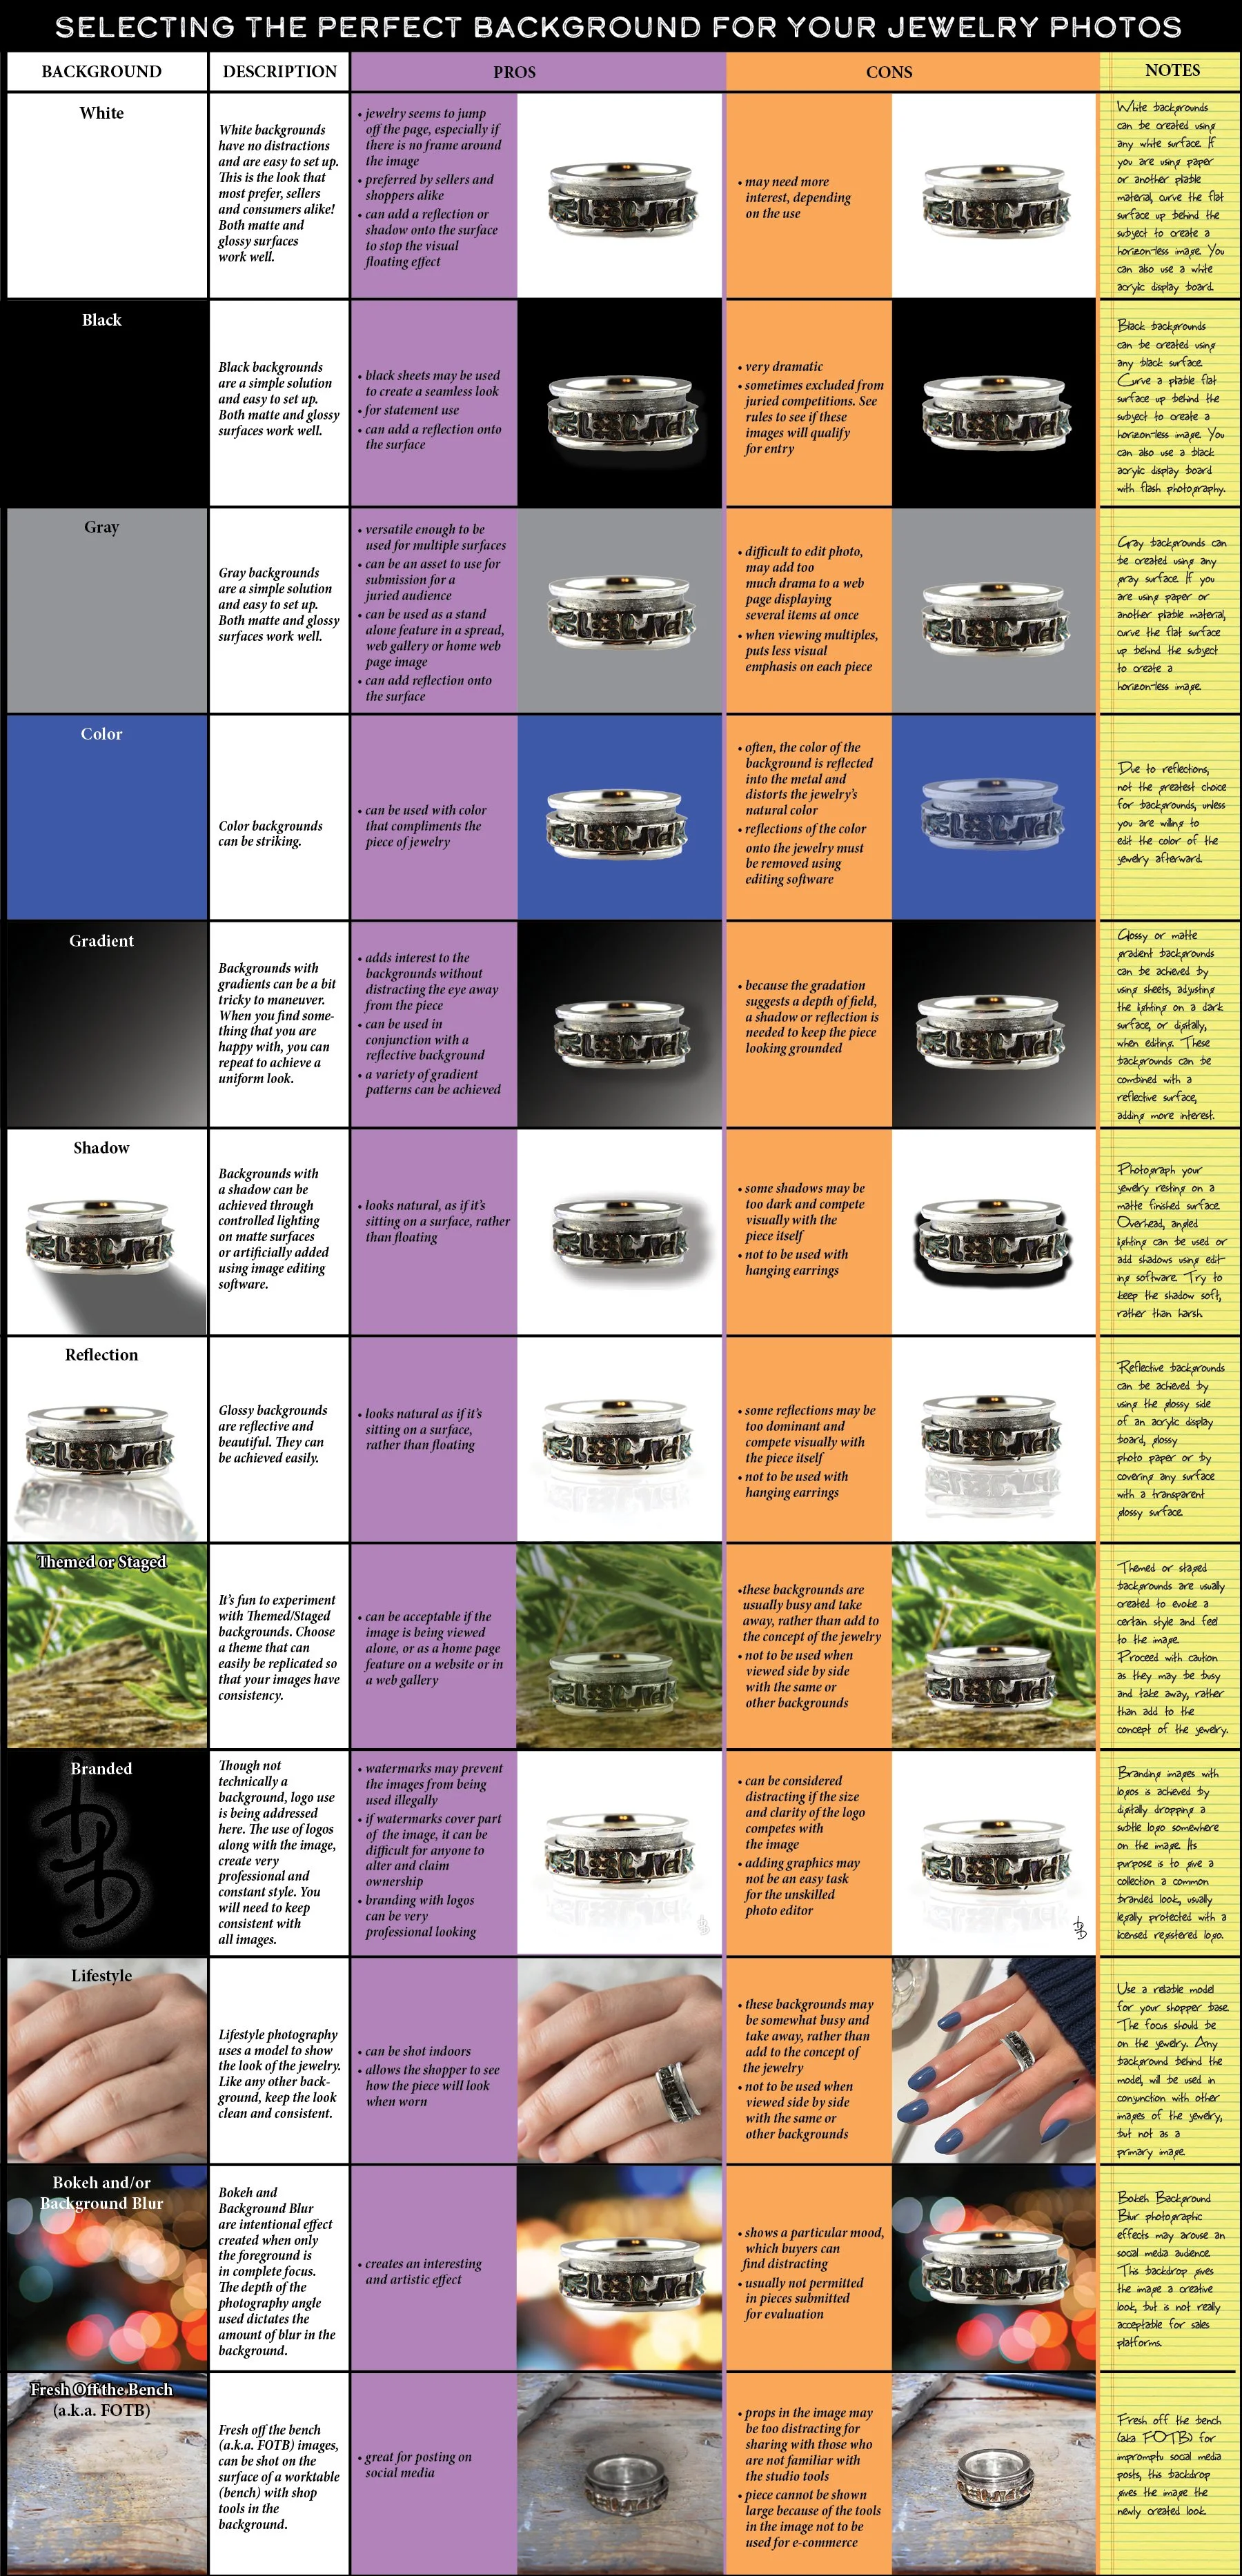
SELECTING JEWELRY IMAGE BACKGROUNDS
Many have submitted images to me for editing. Almost always, I send them back to the drawing board (camera) with specific instructions regarding the background of their jewelry images. There are so many to chose from, but selecting the best background is always a good place to start. I have devised a chart, along with pros and cons, that should help simplify choosing the best option to meet the needs of your images.
How to make and use a prop box
for photographing wire earrings

WHAT YOU WILL NEED:
• small, sturdy box (top or bottom) with black, white or gray interior
• a tool to drill a hole through the box
• short length of translucent straw or tubing (optional)
• earrings
• digital camera or phone
• tripod
• fine nylon thread
• flat two-holed button
• duct tape
STEP ONE


• Use a small firm box with black, white or gray interior.
• Drill holes on either side near the front, at least a half inch from the top.
• Insert a fine translucent nylon thread through each of the holes and around to
the back of the box.
STEP TWO


• Thread the ends through a two-holed flat button and tie securely behind
the box. The button will help you tie the ends close to the box. If it still isn’t
taut, don’t worry. You can secure the button by duct taping it to the lower part
of the box to pick up any slack. Thread should be tight enough to keep the weight
of a pair of earrings from sliding to the center on the line of thread.
STEP THREE

• Hang the earring wires from the thread inside the box.
• If the earrings are sliding too close together, cut a 1/4 to 1/2 inch length of fine
translucent straw or tubing as a spacer. I used medical tubing for this
demonstration. Cut a slit from end to end so that tube can be inserted and
removed from thread, as needed. Use the slit to carefully, put tube onto the
thread in the box.
STEP FOUR

• After the earrings stop swinging and are still, you can set your camera on a
tripod and photograph them in the box.
• Crop, lighten and edit your image using any basic photo editing apps or
software. If the thread and tube are visible in the image, you will need to use
more sophisticated photo editing software to clean up the image, or hire a
professional to do the job.*
*Photo editing services available on our Services page.
How to Make and Use a Prop Box
for Photographing
Post Earrings

WHAT YOU WILL NEED:
• small, sturdy box or lid, if deep with white interior (cell phone boxes are best)
• small sheet of craft foam
• a tool in which to drill a hole through the box with a 1.1(more or less) diamond
drill bit
• UHU stic or similar adhesive
• post earrings
• digital camera or phone
• tripod or other secure rest for the camera
STEP ONE

• Measure the bottom inside area of your box and cut a sheet of white craft foam the
same size as the bottom of your box.
STEP TWO

• Using UHU stic or a similar adhesive, apply to both the inside of the box and one
side of the craft foam. Allow a couple of minutes for it to slightly dry and then
attach both glued sides together inside of the box. Apply pressure for a few seconds.
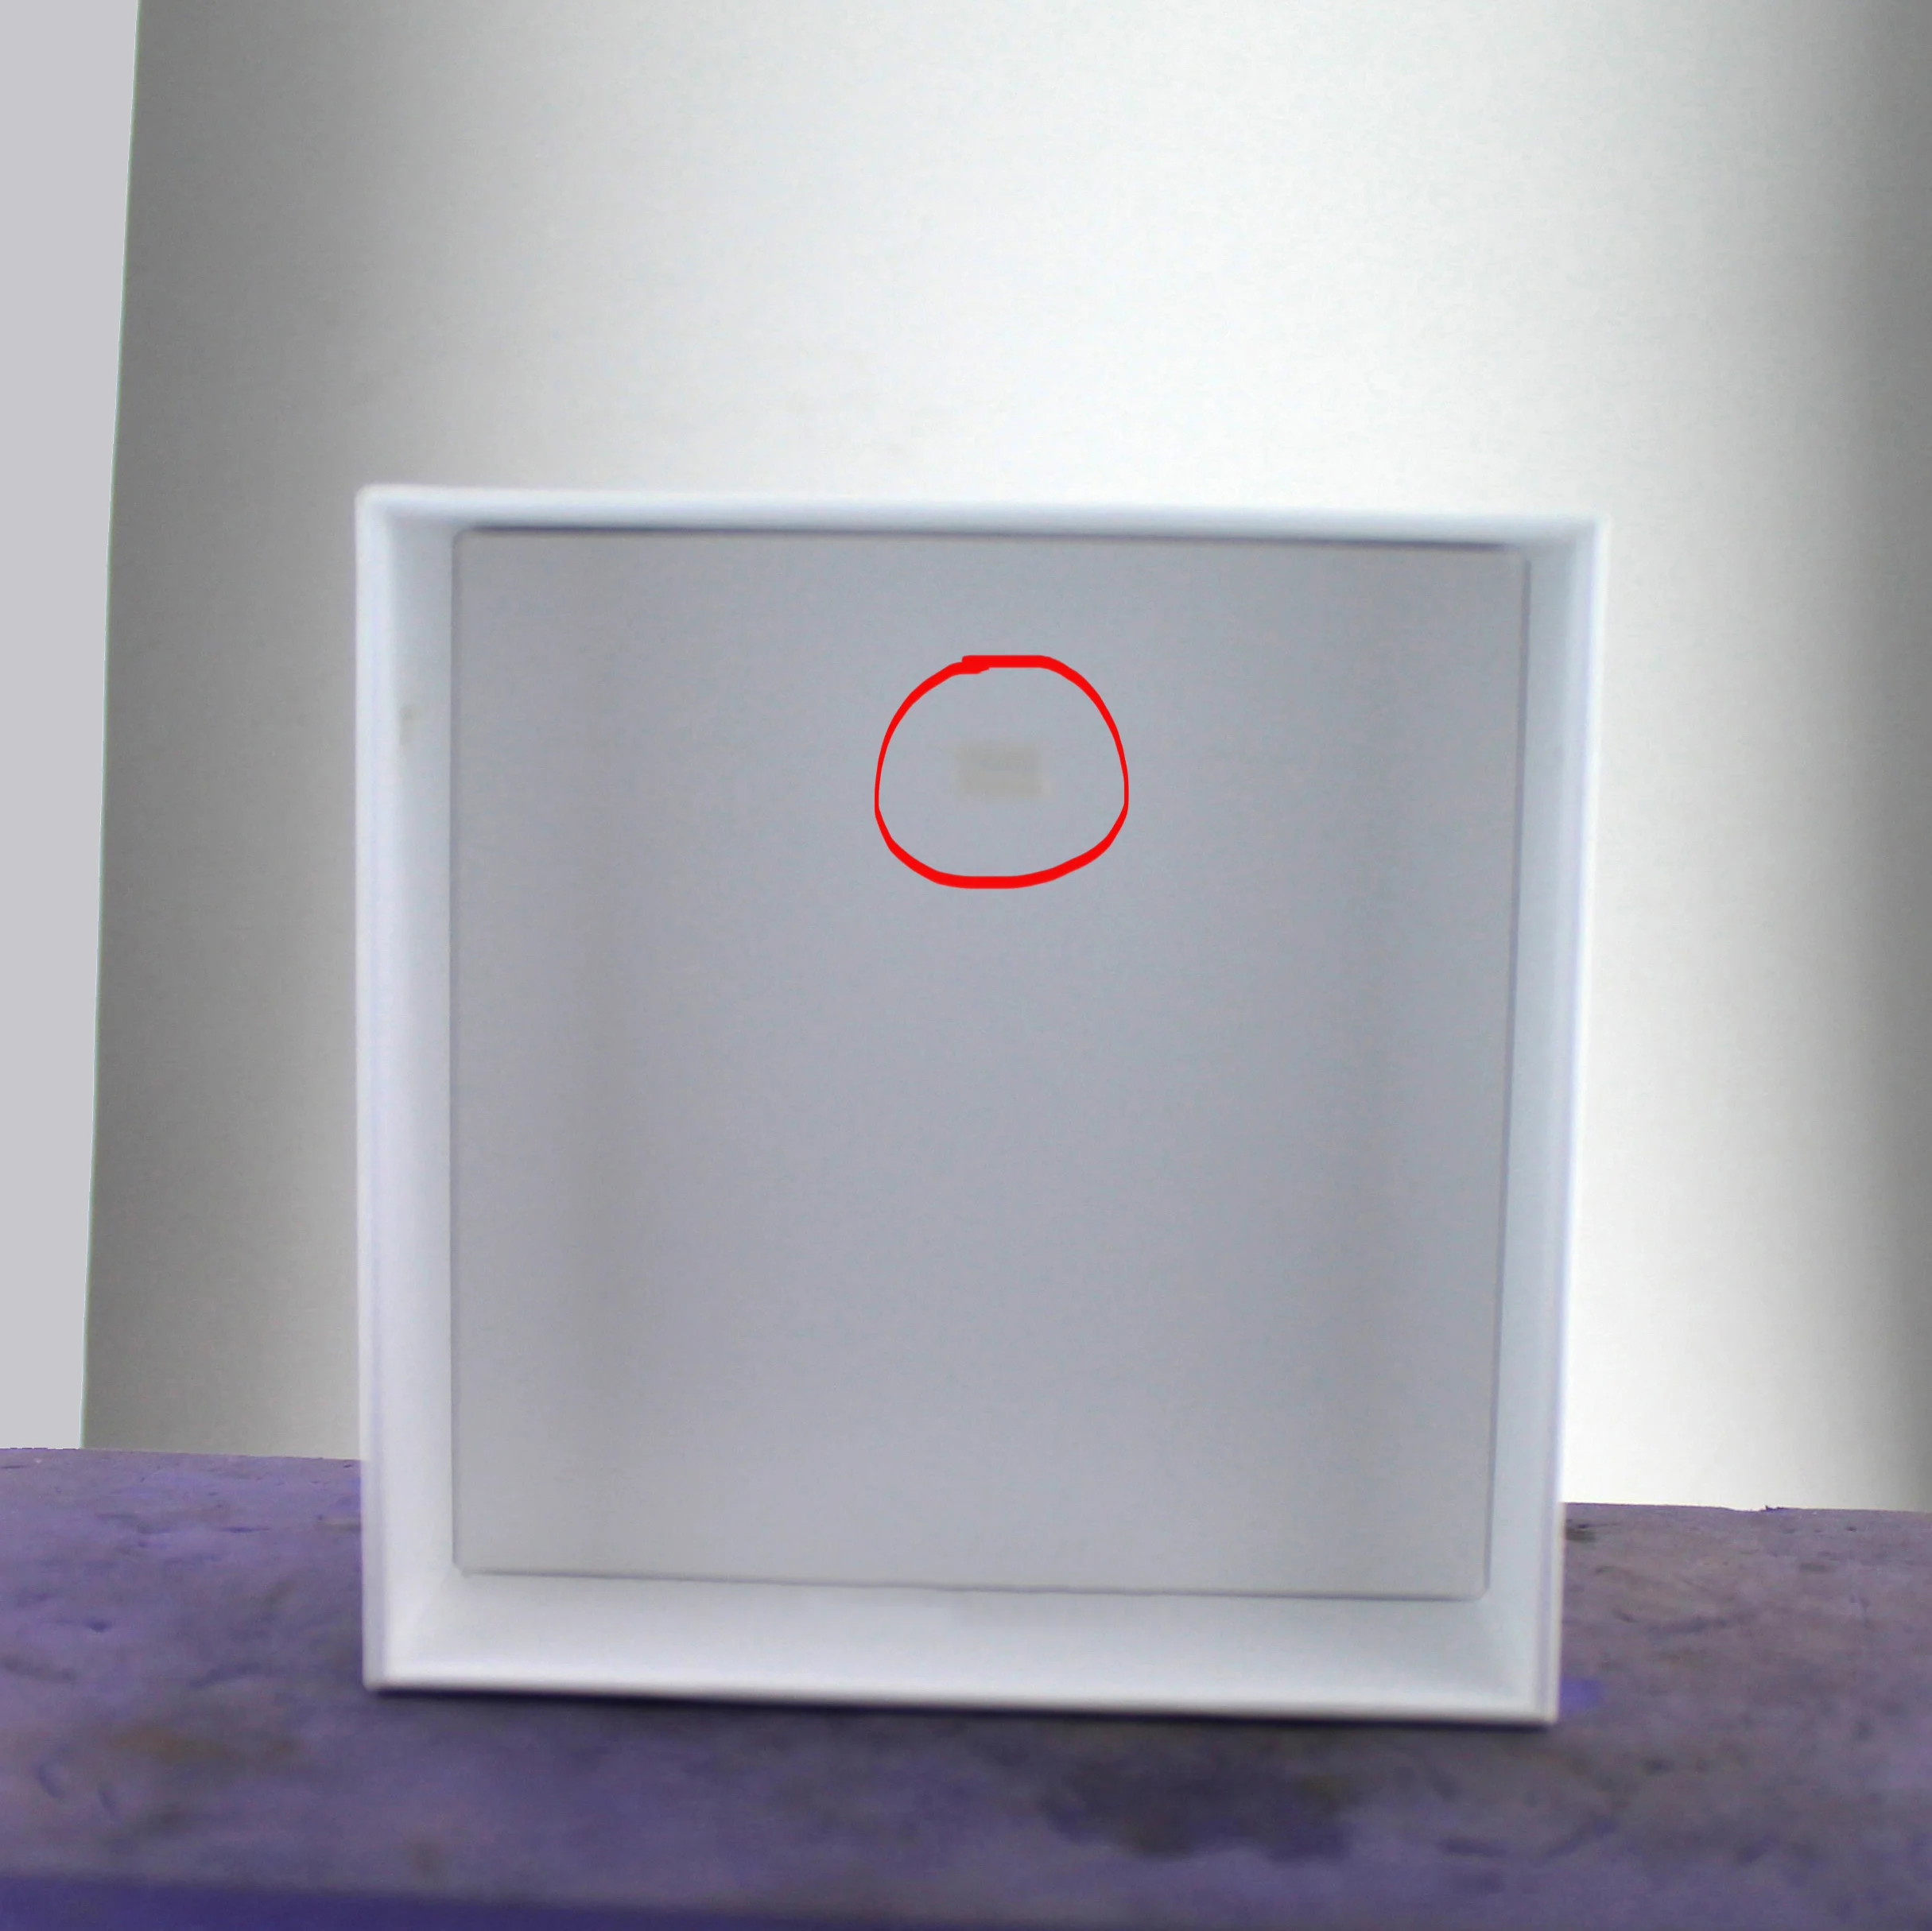
STEP THREE

• Mark two side-by-side points on the back of the box about an inch from the top.
These marks will be where the earring posts will fit in. Make sure they are far enough
apart to allow for earrings with a wide top or drape. You can also make alternate
boxes for different size earrings if necessary.
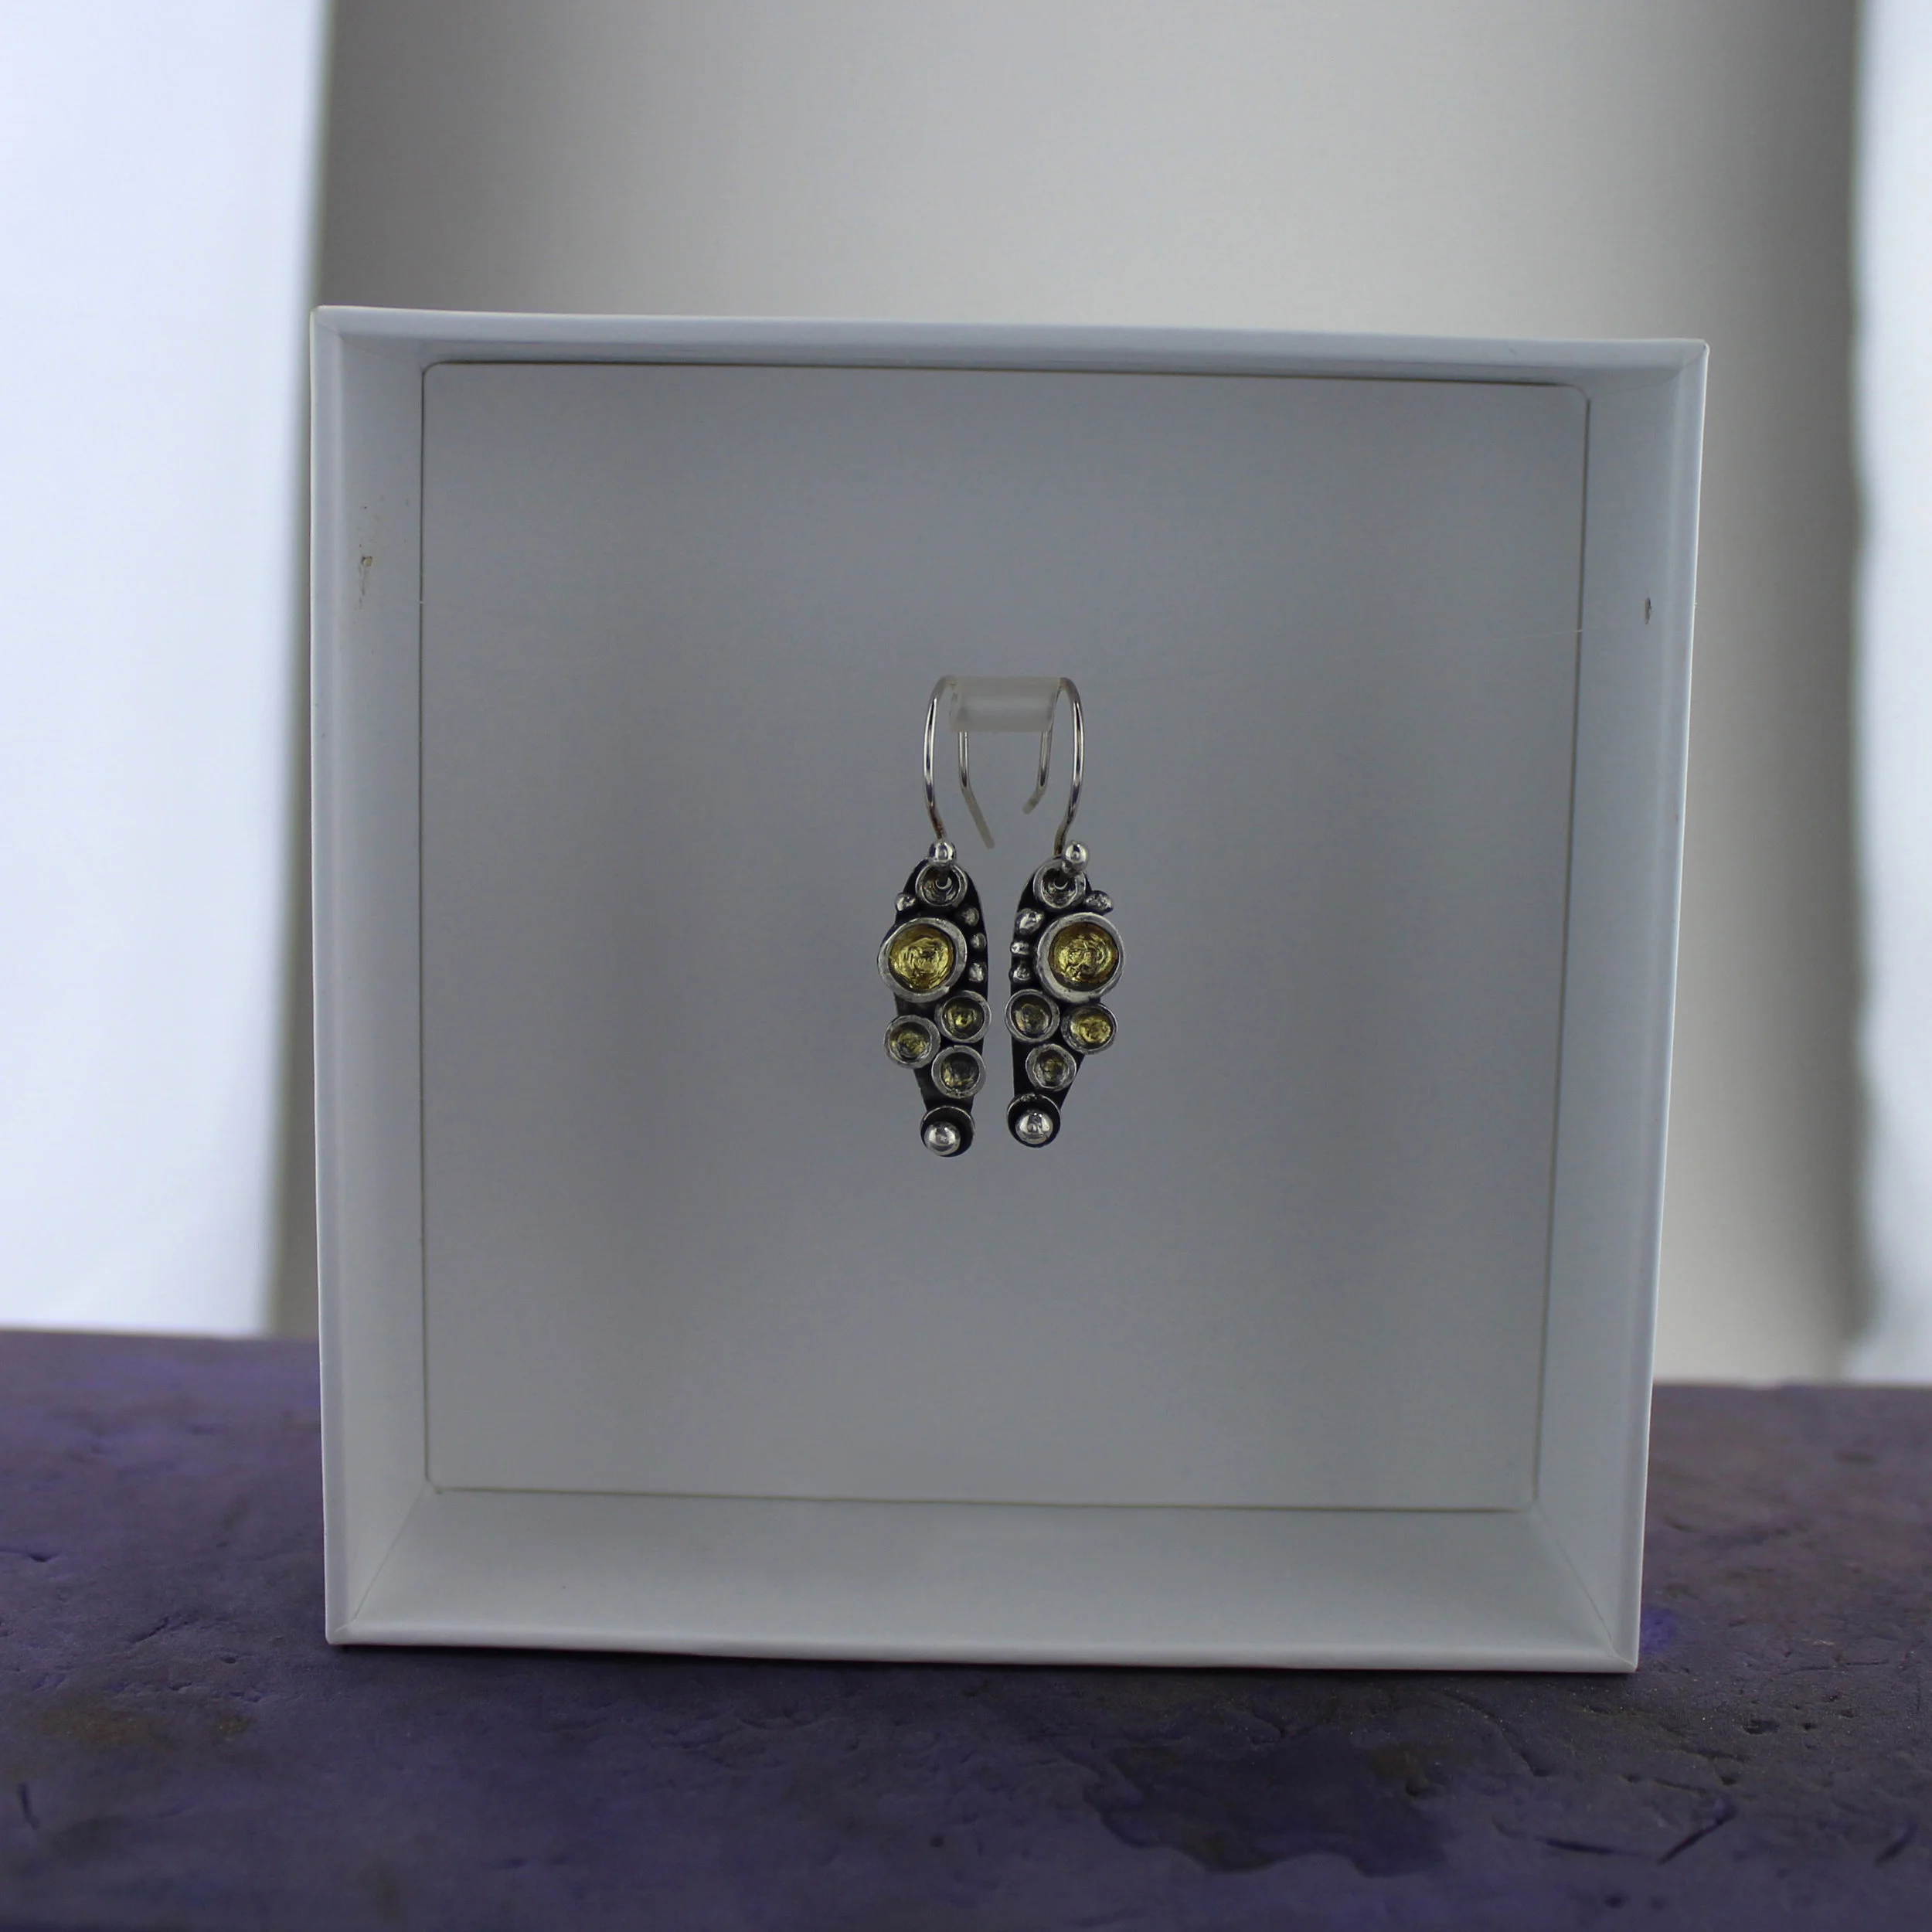
STEP FOUR

• Your post earring prop box is now ready to use. Put your earrings through the holes
in the inside of the box, with the earring backs behind the box. The craft foam
allows the backs to fit securely without marring the box. Your earrings are now ready
to digitally capture!
STEP FIVE

• Using a tripod or a steady rest, you can now take a great photo of your earrings.
Don’t forget to wait for them to stop swinging (sometimes it takes a while). Crop
out the box when you lighten the photo. Most images will need these minor touch
ups post production.
*Photo editing services available on our Services page.
How to use MUSEUM WAX to Prop a Ring
for Photography

WHAT YOU WILL NEED:
• ring
• digital camera or phone
• black, gray or white surface, at least 6 inches square
• tripod
• small wad of Museum Wax, Reusable adhesive putty, hot glue or polymer clay
• lighting or camera’s flash
STEP ONE

• Use a black, gray or white surface on which to set your ring, preferably
reflective, but not necessary. Here I am using white.
STEP TWO

• Set the smallest amount, of putty or wax as possible on the surface to support
the weight and angle of your ring. If you will not be able to edit it out in the
editing stage, you will want to use an inconspicuous color, that blends into your
background surface. If you will be editing it out, it’s easier to select the putty, if
you use a contrasting color.
STEP THREE

• Set your ring at a slight angle on the putty. You may need to try different angles,
to see which are the most flattering for your ring. Set your camera on a tripod
and photograph the ring. Make sure that the putty is not covering up any part of
the ring, from the camera’s perspective. I am using blue putty for this demo.
STEP FOUR

• After photographing at several angles, chose your favorites and crop, lighten and
edit your image using any basic photo editing apps or software. If the wax or
putty is visible in the image, you will need to use more sophisticated photo
editing software to clean it up and add a slight shadow, if you wish.
*Photo editing services available on our Services page.